Notifications
Concept
Shuup has a notification system that allow users to handle events triggered by the platform and execute actions for that when a set of configured conditions are met. It can be translated into this phrase: Do an action when an event is triggered if a condition is met. (e.g.: Send an email to the customer when received a new order if the user has a valid email).
Events could include:
- Orders being created
- Shipments being dispatched
- Vendors requesting registration
- Many others
Notifications may be delivered over different channels, such as email. As delivery channels are also pluggable (which requires developed addons that handles the channel), notifications are basically the Actions that will be executed by the platform.
Configuring Notifications
To handle a notification, go to Settings > Notifications. Click on New Script.
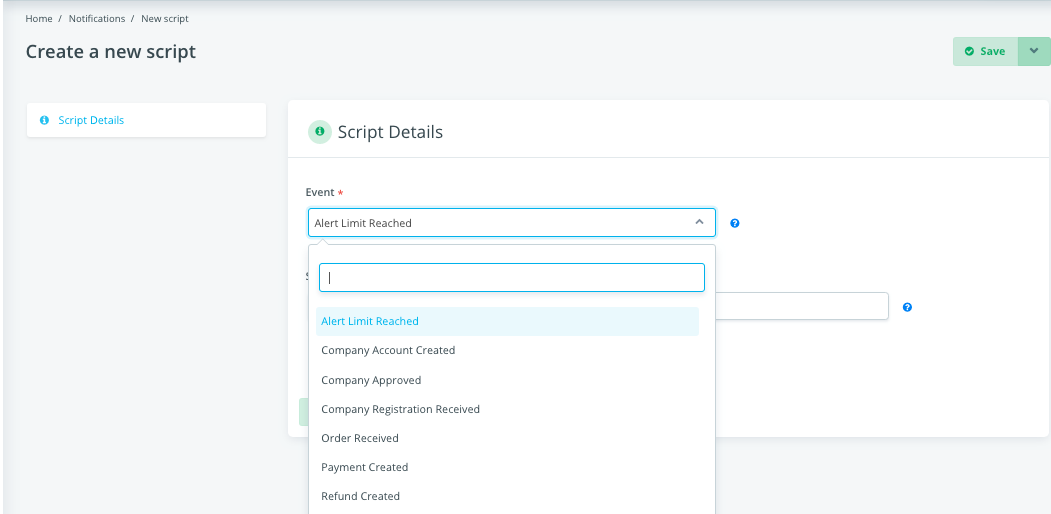
Select the event you want to handle and give it a name to describe what it is doing, like Send customer email on receive order and make sure Enabled checkbox is checked. Click OK.
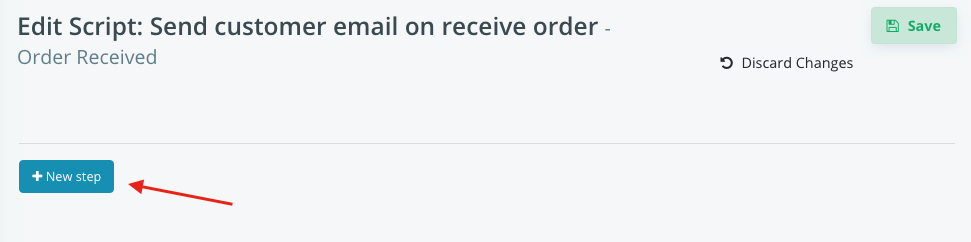
After that you should see a blank page with a New Step button. Click on New Step button, a new row will be visible.
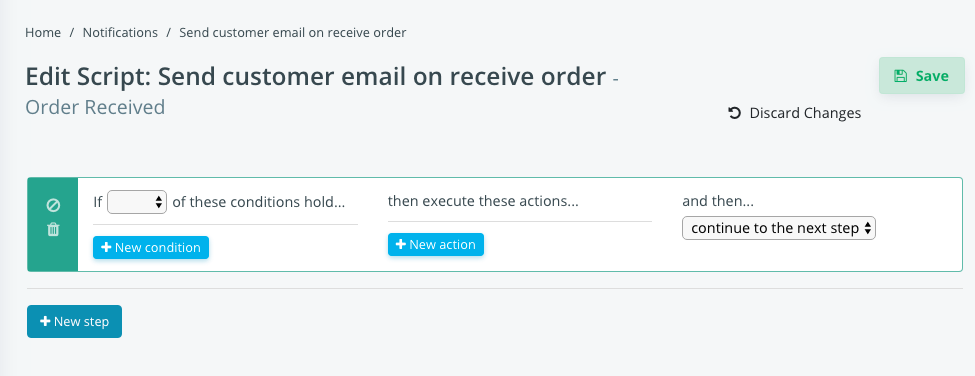
The script can have as many steps as you want, you can remove steps and also disable them. You can add conditions to each step to be executed, like checking whether the customer has a valid phone or email before actually sending the email/SMS.
Select the All operation next to the New condition button if you don’t want to add any condition (this will make sure the script will run every time).

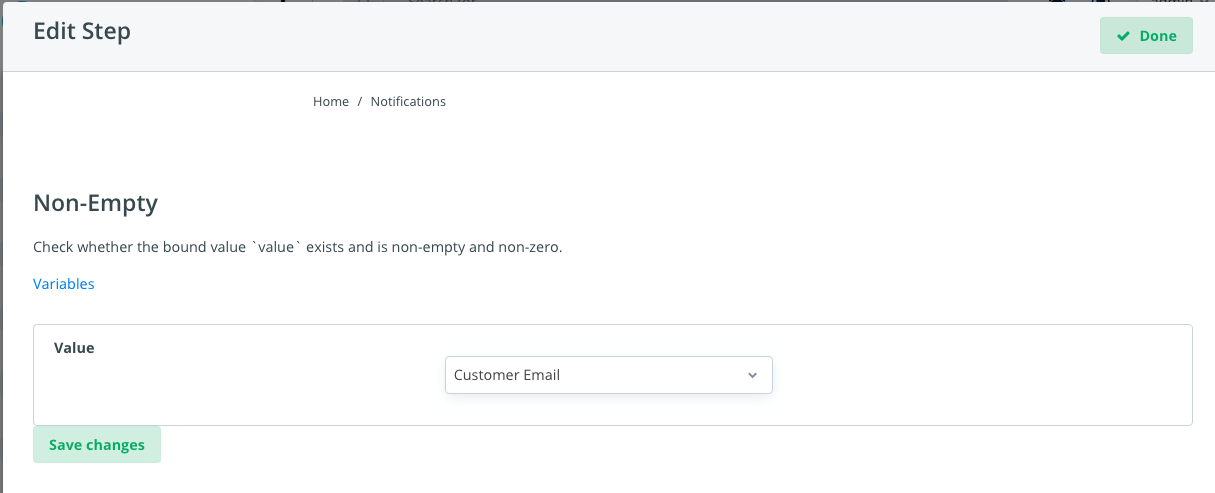
To add a new condition, click on New condition button and select the desired one. A form will appear to be configured with all the parameters of the selected condition. Here is an example of Non-Empty condition:
After you configured the condition, click on New action to select how to handle the event.
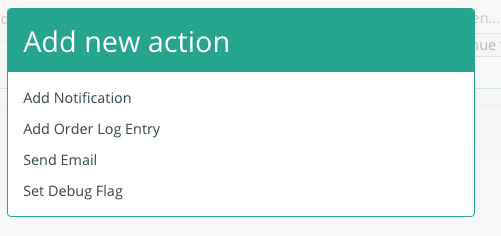
Select the action type (like Send email). A new form will be rendered to fill all the parameters of the selected action.
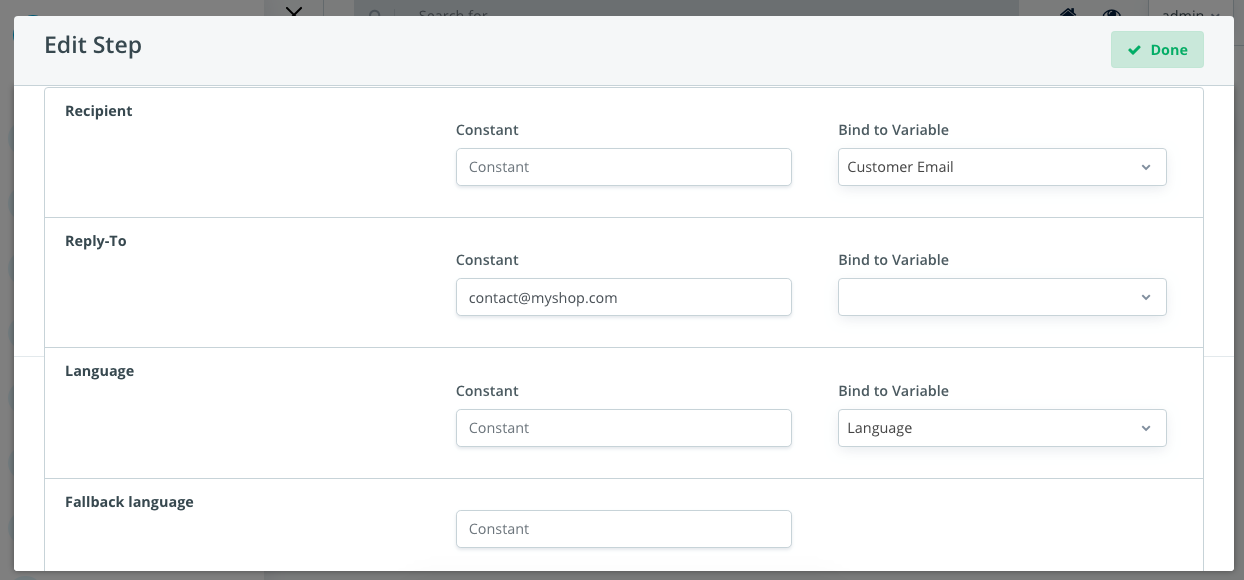
In Send Email action, you need to fill the Recipient and the Language of the email to be sent (and other optional fields). As you may ask yourself, how can I know the email of the customer in cases you want to send an email when customer places an order? In these cases, the event will provide “variables” that can be bound to the action parameters. In the Order Received event, for example, it provides a Customer Email variable you can use in the Recipient, so it will use the email that customer entered when placing the order. Each event can provide a different set of variables that can be used in the script.
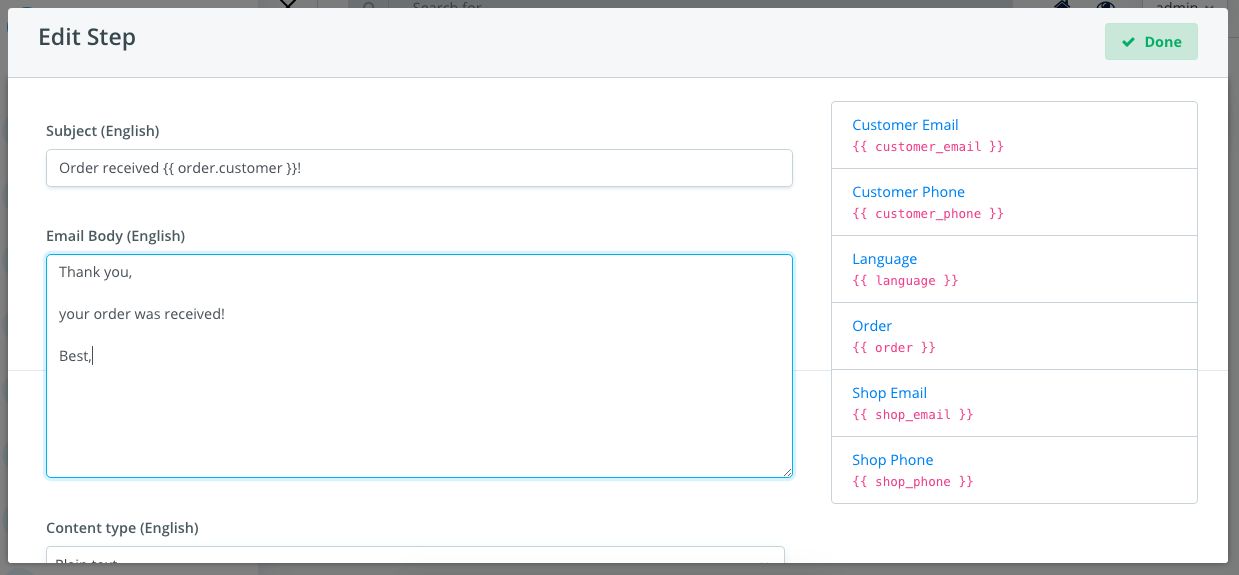
Some actions may request text contents as parameters. This is the case of Send Email event which requires the merchant to fill the email subject and email body to send to the configured recipient. To configure the email template, click on the language tab and fill the subject and body fields of the email. You may notice a list of variables on the right side. Those strings are special words (variables) that can be used in the email subject or body and they will be replaced by the value it describes when generating the email to be sent.
Make sure to save the email parameters by clicking on Save Changes button and then click on Done button. Save the entire script by clicking Save and the notification is completely configured.